General Overview of the Agent Console
The agent console is characterized by allowing the management of multiple communication channels simultaneously and transparently. An agent can be on a call while sending or receiving text or multimedia messages.
Logging into the agent console
To access this section, you need to go to the
PBX administration interface and navigate to: Contact Center → Panel. Alternatively, you can access it via the URL: https://domain_pbx/fop2. From this section, an agent login form will be displayed, where you must enter the credentials of an agent user previously created in the Users section of the Panel Manager of Issabel Contact Center. 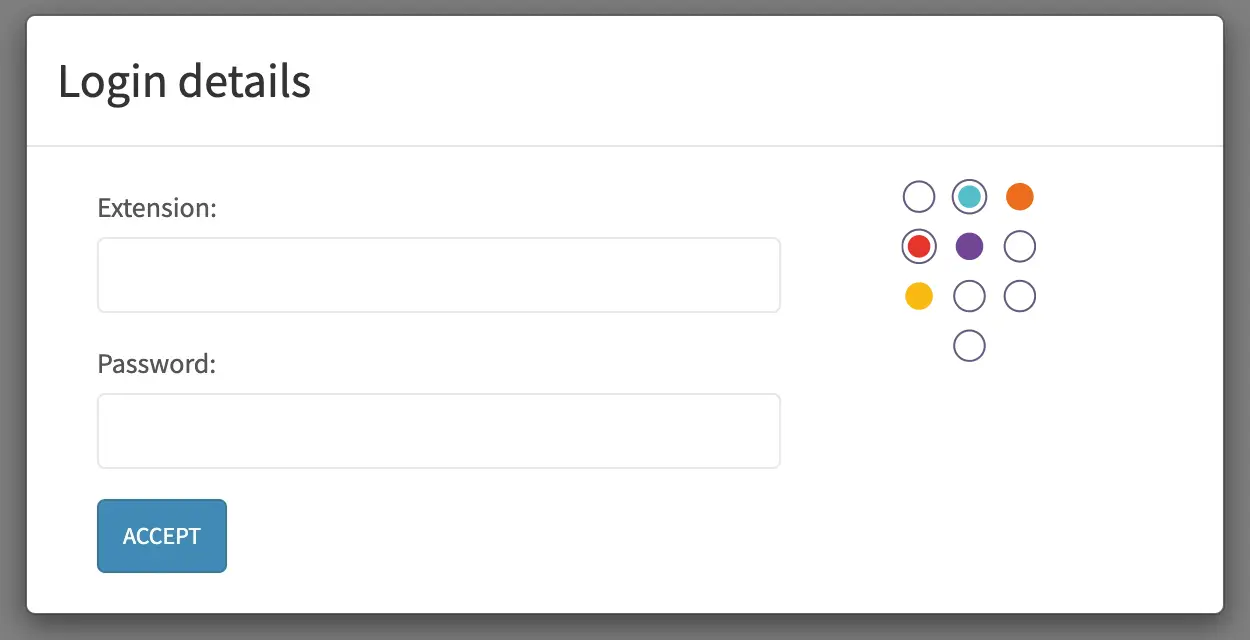
This section consists of several areas such as Chats, queues, console, trunks, scripter (if installed), among other functions.
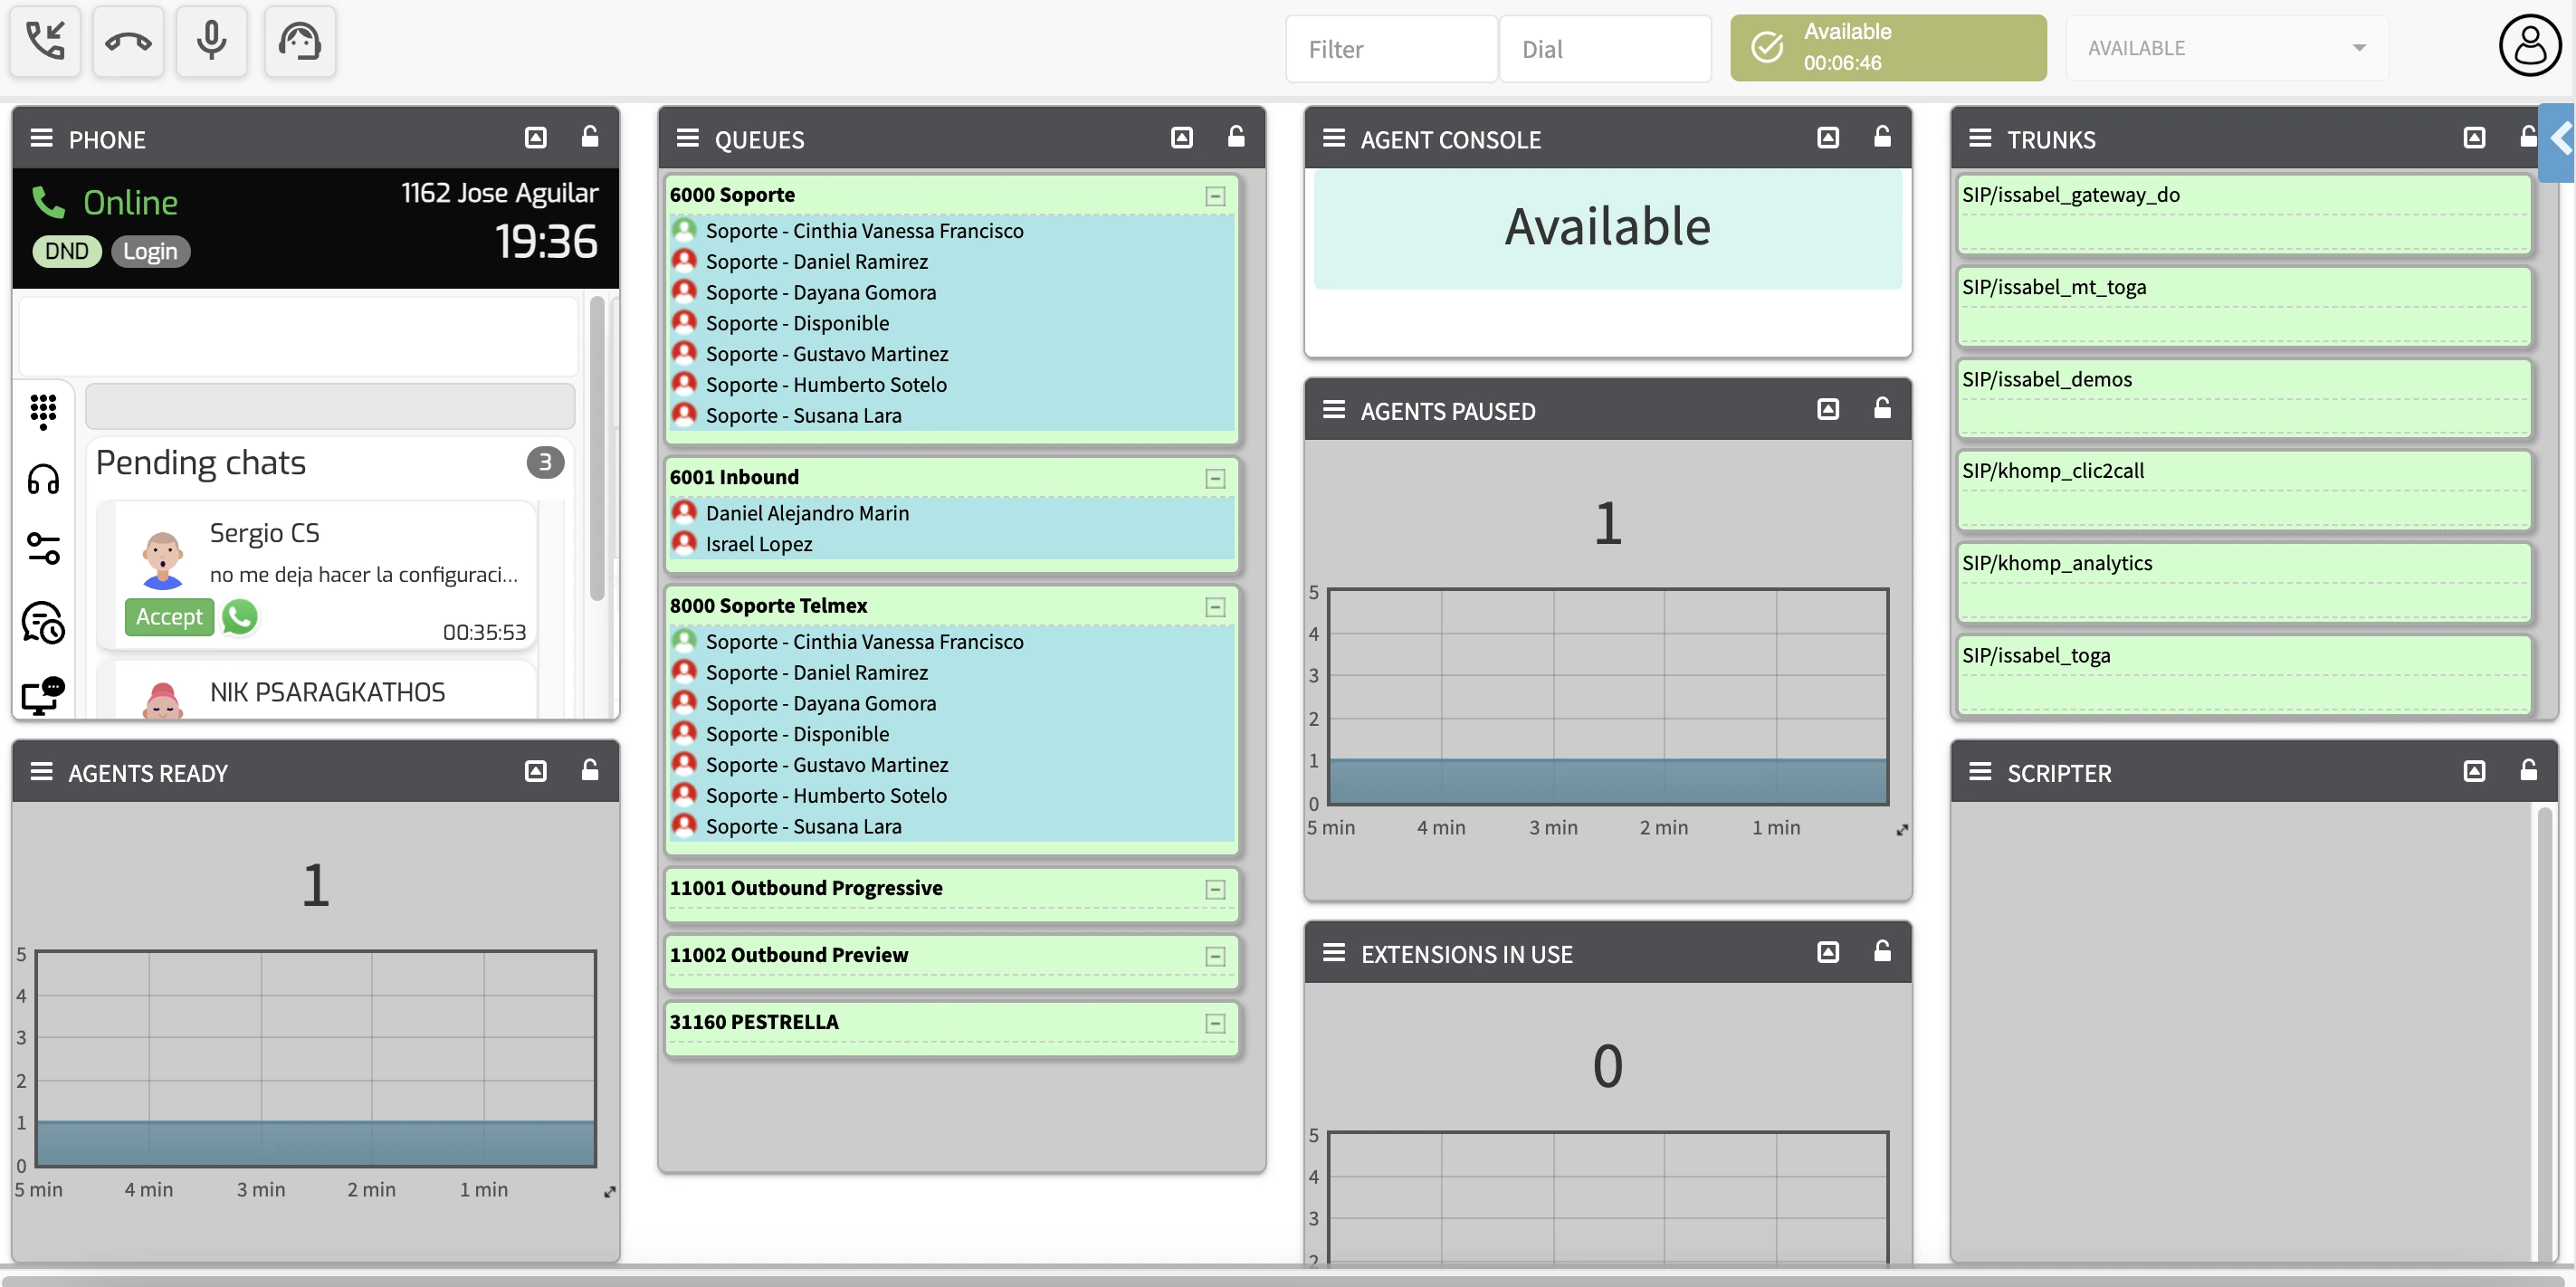 Console setup with several widget elements
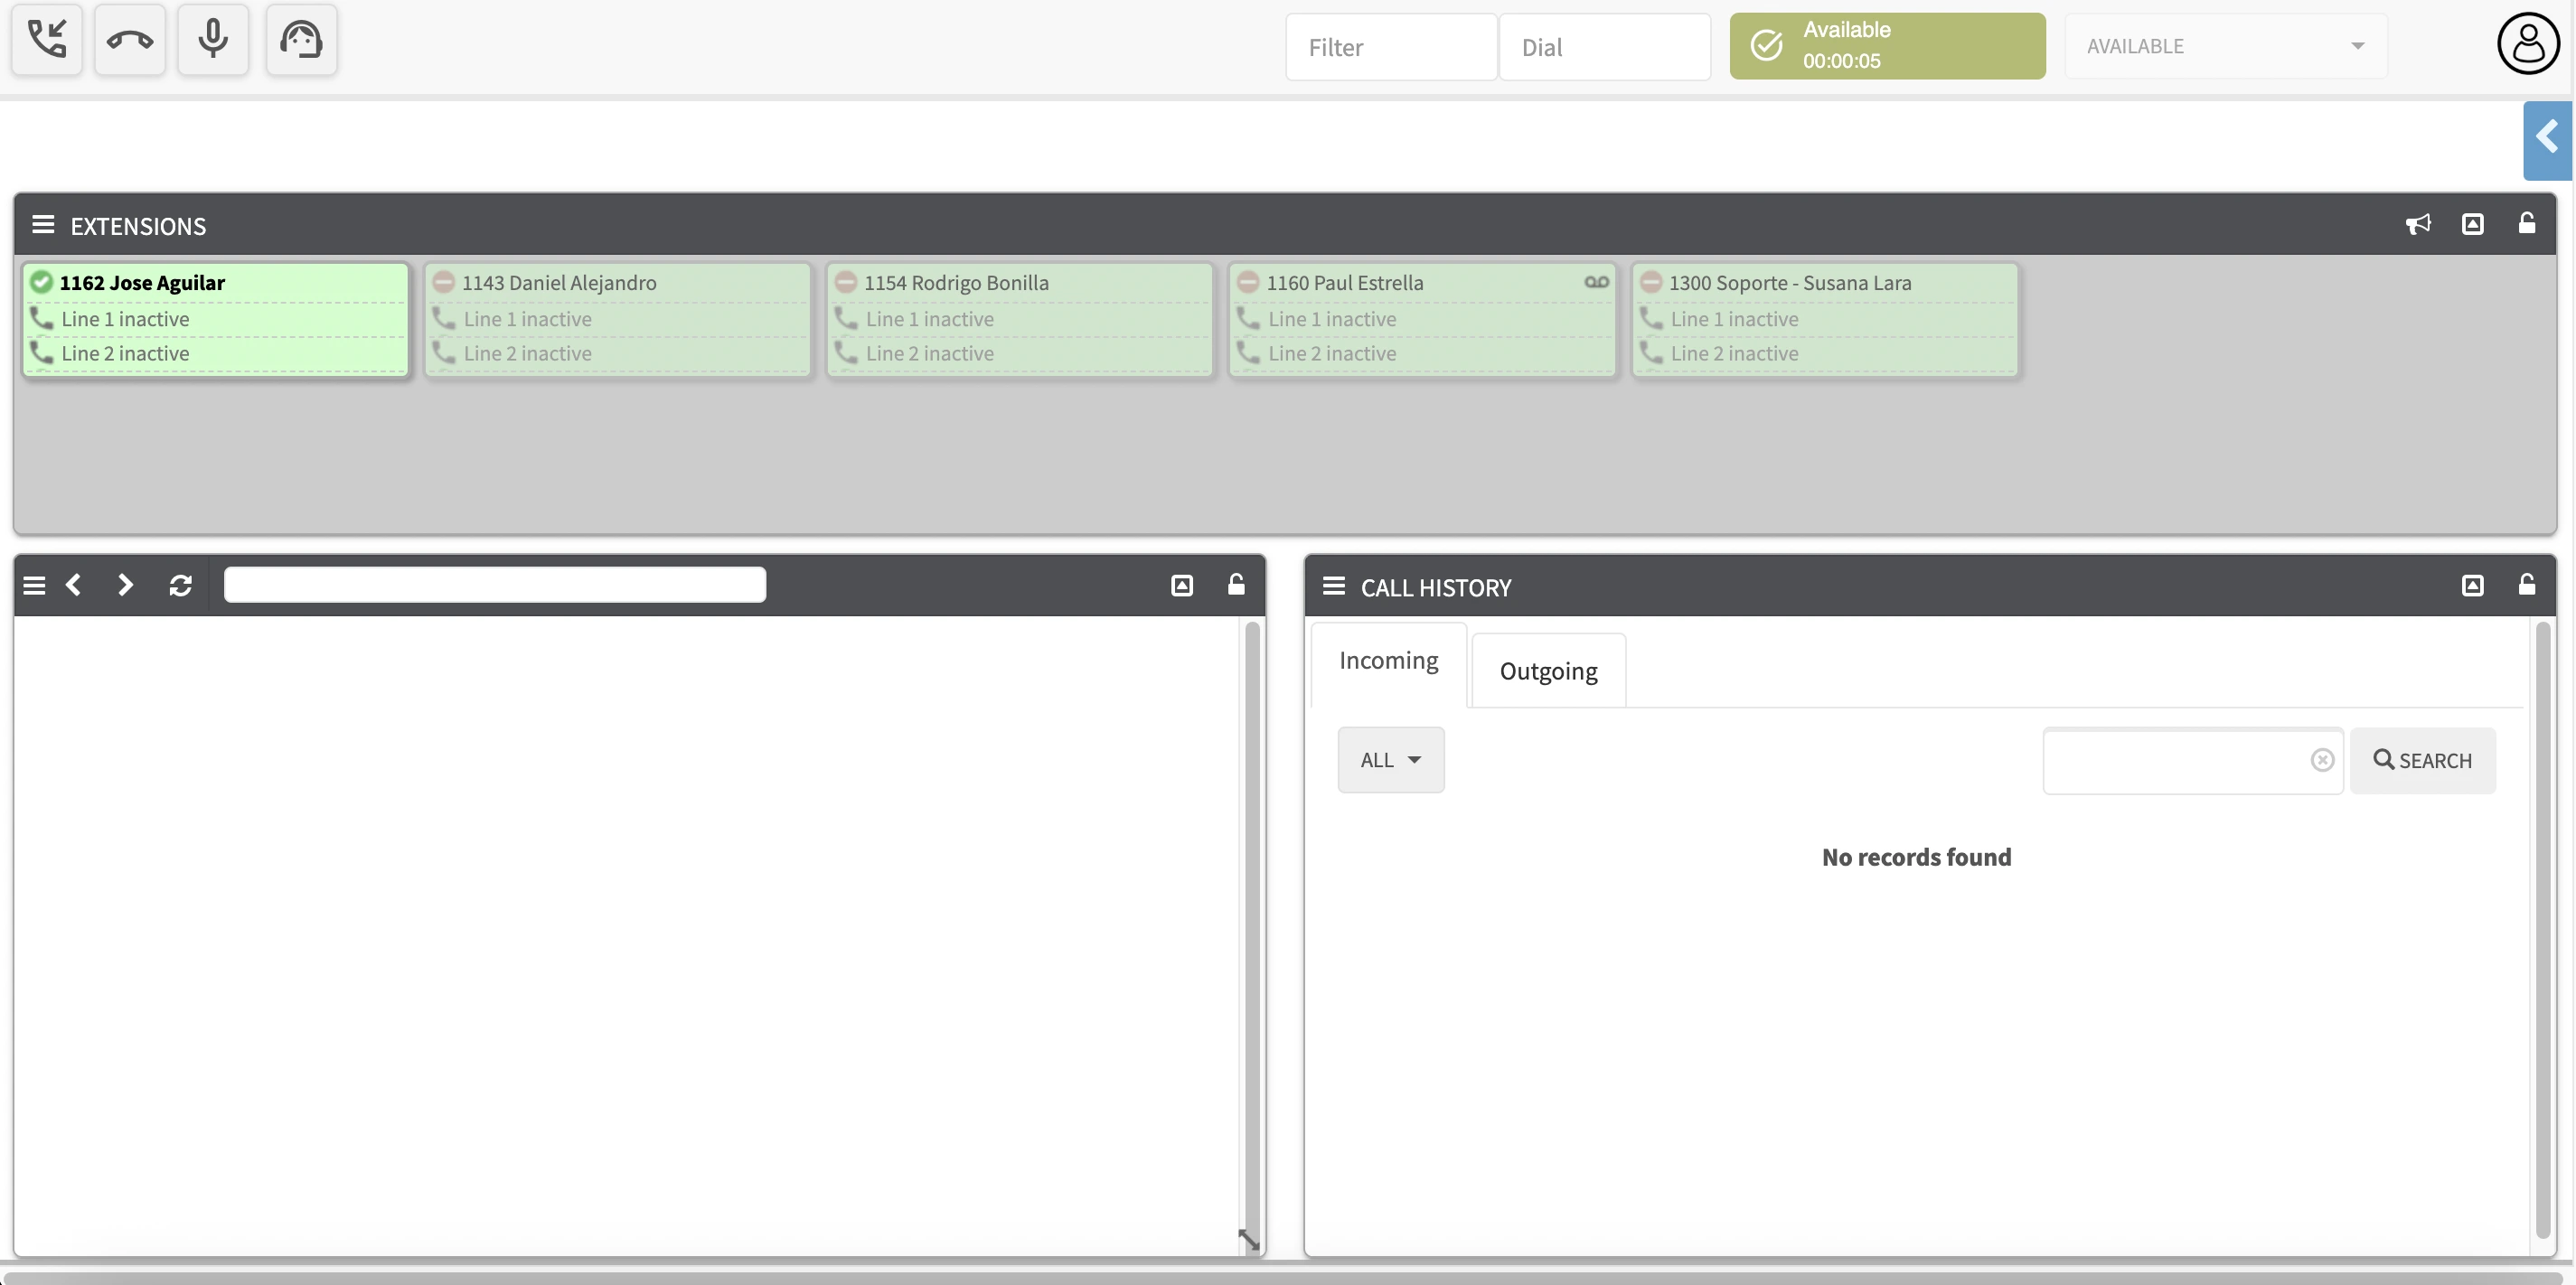 Another layout with fewer elements
Main elements of the agent console
The agent console is divided into two main areas: Status Bar and Work Area, each with specific features that optimize the user experience.
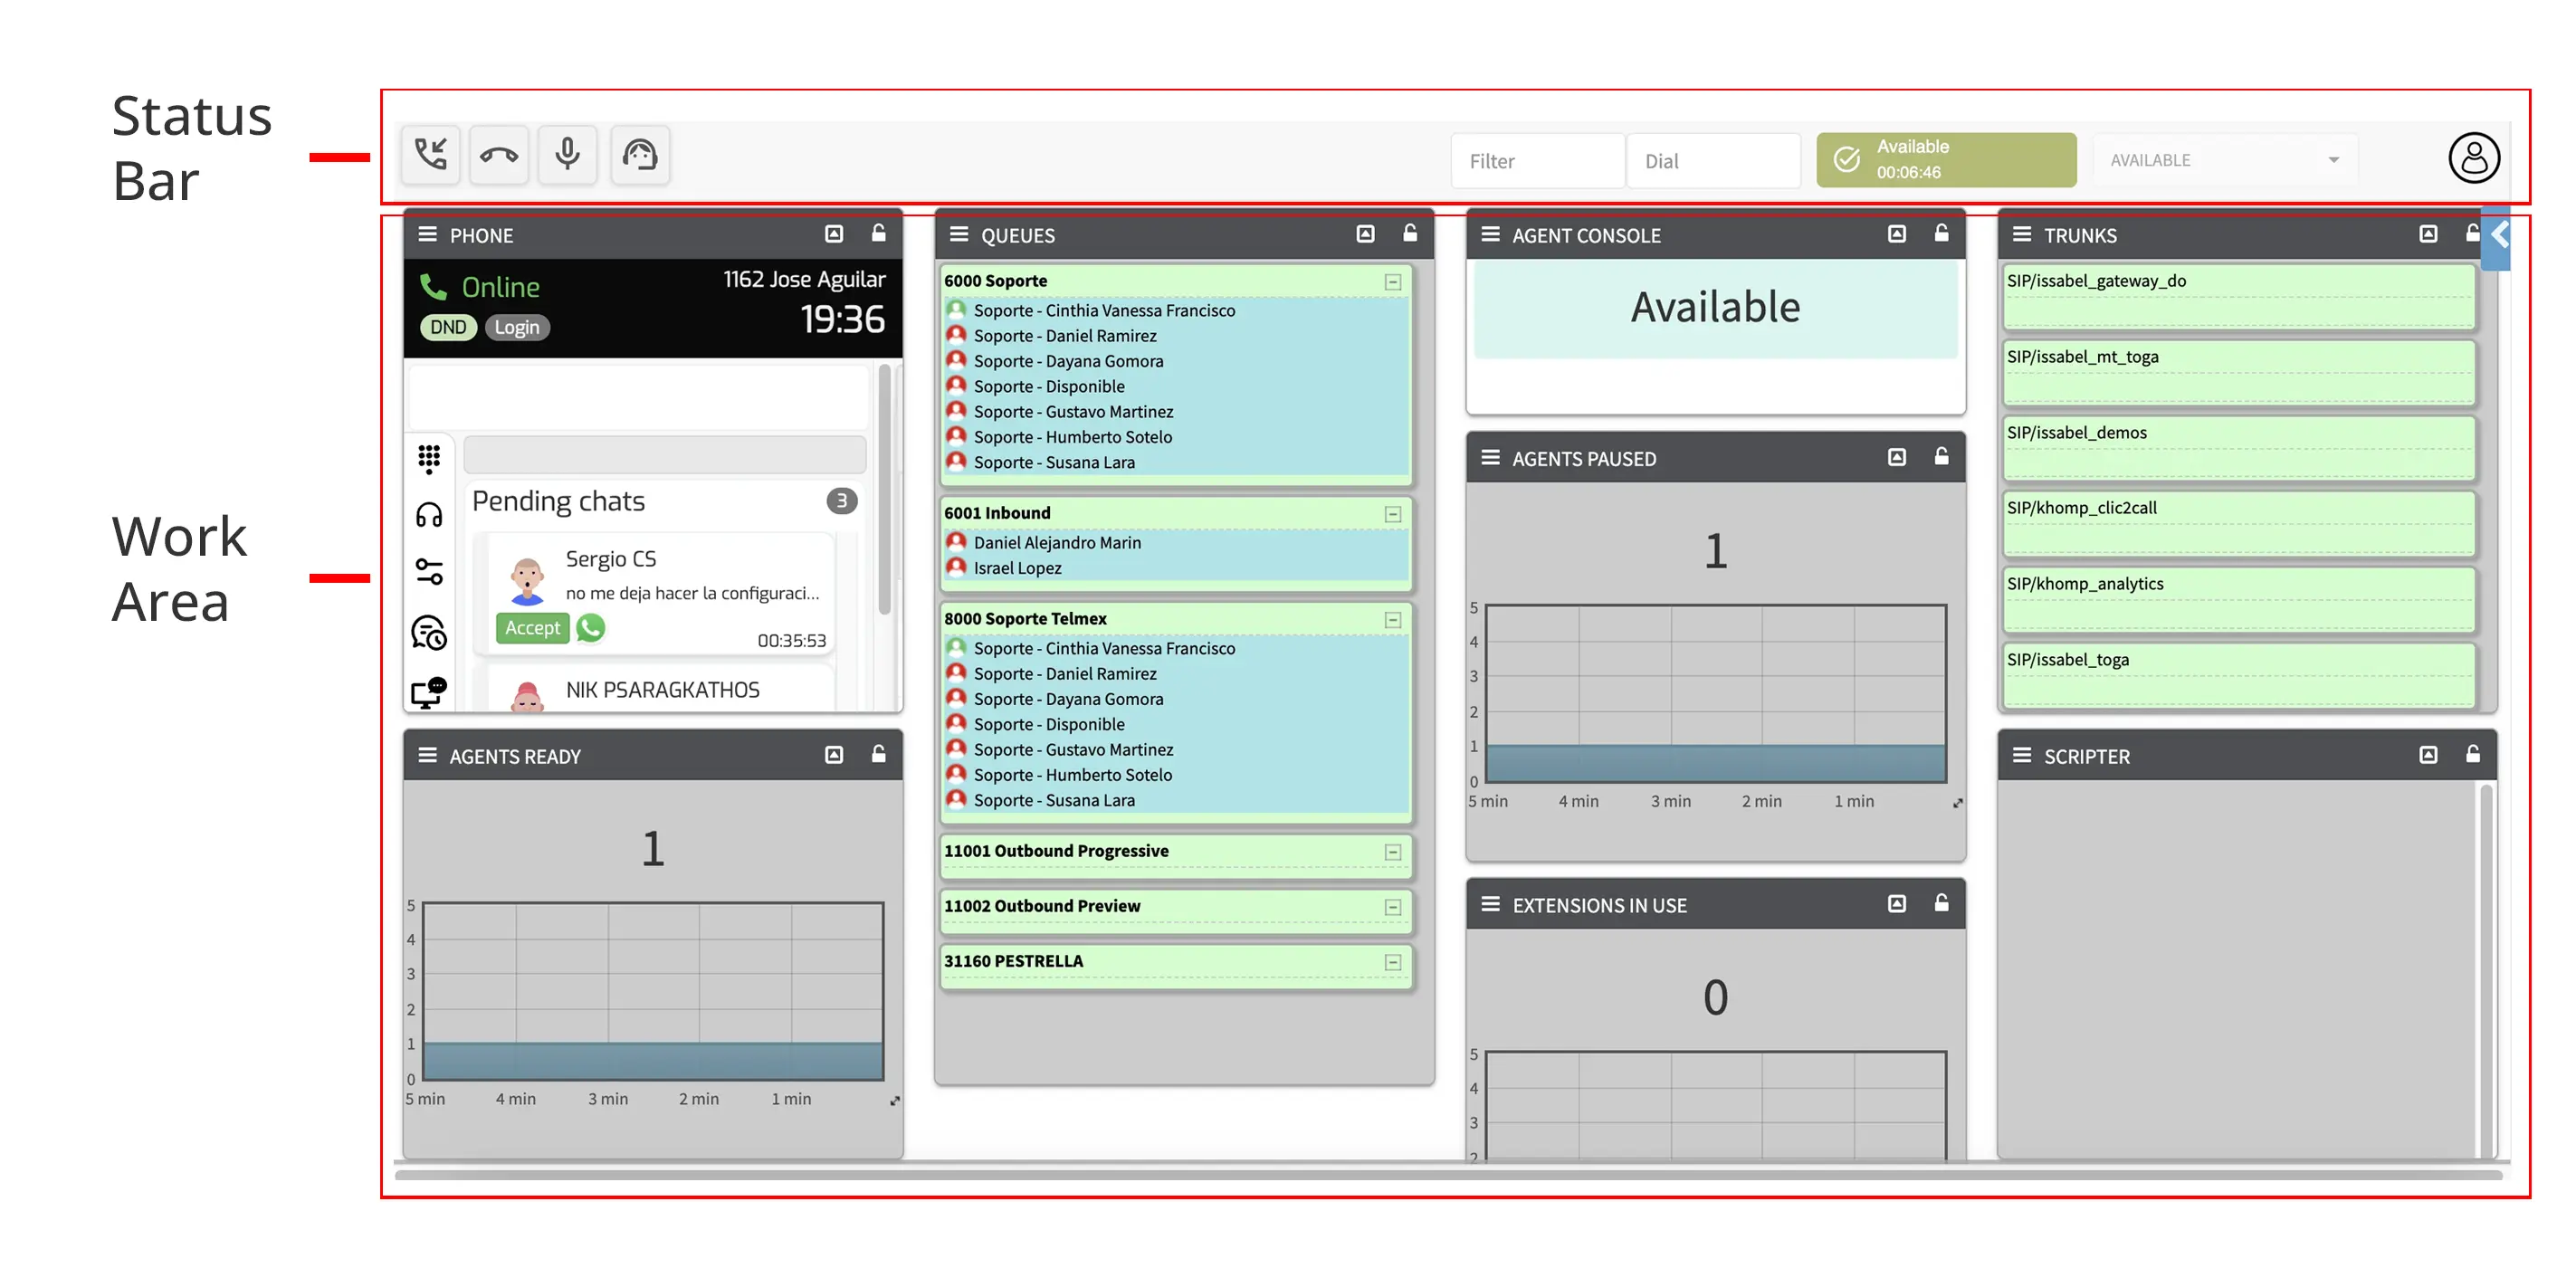
Status Bar
The status bar is a key section of the console, where agents can quickly access essential settings and tools. It includes the following features:
- Queue login button: Allows the agent to join or leave assigned queues, thus controlling their availability to receive calls. The contact center also allows for profiles that include queues from different campaigns. In such cases, the button grants access to a profile.
- Quick dial box: Provides a field to manually enter a phone number. Pressing "Enter" initiates a manual call, independent of configured campaigns or queues.
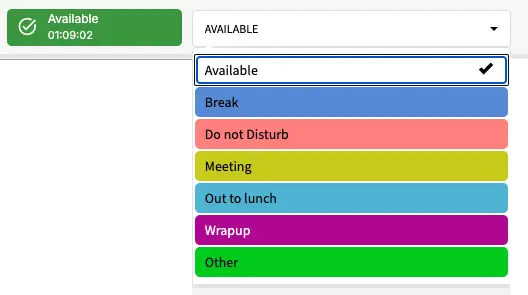
- Agent status notifier: Indicates whether the agent is available or on break.
- Possible states:
- Available: Ready to receive calls.
- Paused: Not available to receive calls from any campaign. Although pause names are customizable, they all fall under the "Paused" state.
- Status or break selector: Allows the agent to switch between available and paused, selecting the pause type configured by the administrator.
- Account settings: Provides five key options:
- Preference settings: Customize the console based on agent needs.
- Access to mini CRM or contact list: Manage contacts and related activities.
- Message inbox: View and manage internal messages.
- Call history: View details of inbound and outbound calls.
- Logout button: Securely exit the system.
Work Area
The work area takes up most of the screen and is where agents directly interact with the features assigned by the administrator.
Key Features
- Available functionalities are defined and enabled by the administrator through customizable templates.
- Each functionality is presented as a widget, which can be resized and repositioned according to operational needs.
Available Widgets
Some of the functionalities that can be added to the work area include:
- Webphone Pro: The most important element of the console. It's a web-based phone used for handling inbound and outbound campaign calls, and for agent interaction in digital channel chats. This area will be reviewed in detail later.
- Scripter: Displays scripts created by the contact center supervisor or administrator for a campaign. Issabel Contact Center allows each campaign to have its own script, so the agent receives information specific to the campaign they are working on.
- Agent Event Notification Console: Displays various notifications related to voice campaigns, such as pauses, information about the call being assigned, preview campaign data, and call categorization after it ends.
- Call History: Allows the agent to see detailed records of calls they have participated in, both inbound and outbound.
- Mini Browser: An embedded browser for accessing relevant web resources, including CRM data (as long as the CRM is embeddable and open).
- Extensions: This section displays a lot of information in a compact layout. Buttons appear green when the extension is idle, and red when in a call. When the phone is ringing, it remains green, but a line icon indicates the ringing state. Since version 2.1, a third (yellowish) color is available when using User/Device mode and the device is in ad hoc mode.
- Queues: Besides the queue name, this section shows a list of queue members (agents) with an icon indicating their member status, and a list of waiting calls with a counter and timer.
- Trunks: Trunk buttons are simple and show the number of active channels for a given trunk. Since version 2.10, they also display detailed info on bridged calls (channel name and call ID). Bridged channels are linked to another channel. Calls not answered or handled by an IVR, voicemail, etc., won't appear. Clicking a channel name opens an action menu with a call pickup option, which redirects the call to the connected extension.
- Conferences: If conferences are created and configured in Issabel PBX, this section will display each participant (if the agent has the required permissions). Special actions may also be available for the whole conference or individual participants.
- Mini CRM: An integrated contact book that allows managing contacts and associating call history, SMS, and WhatsApp history. Contacts can be grouped for broadcasting via SMS or WhatsApp channels.
These elements are enabled through templates in the
This is a pre-configuration step where one or more templates can be created, defining access to specific widgets and permissions granted by the administrator. This way, different types of agents can access different widget elements during their console session.
panel manager of the Issabel Contact Center. This is a pre-configuration step where one or more templates can be created, defining access to specific widgets and permissions granted by the administrator. This way, different types of agents can access different widget elements during their console session.
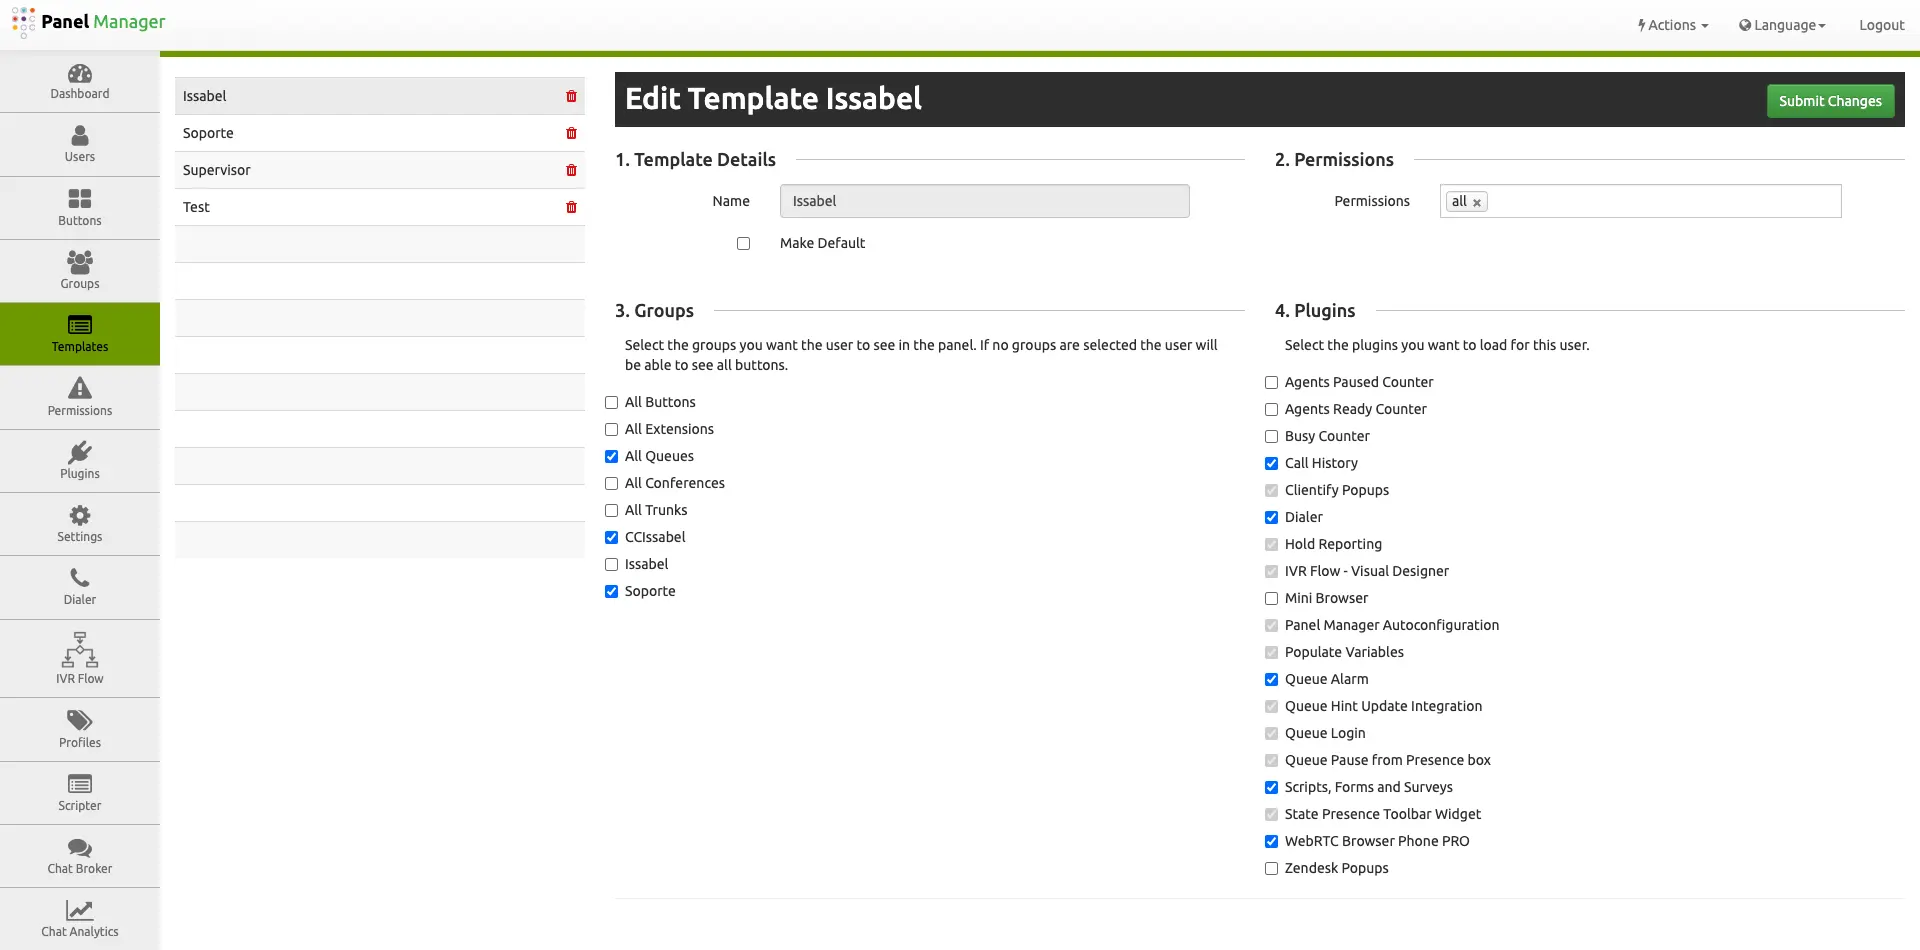 Screen showing template setup in the contact center panel manager
Access to Call Queues
- To allow an agent to access and operate in call queues, they must first be configured as dynamic agents (who can join and leave queues). It is not recommended to add static agents, as they remain permanently in the queue.
- In the status bar, the agent will find, in addition to the elements described earlier, several buttons for call-related actions like answer, hang up, and record. The login button is the one that lets agents join the queues (or profiles) they have access to as dynamic agents.
- Clicking this button opens a dialog box where the agent can select which queue to join.
- Once logged in, the button turns green, and the agent’s status is updated at the top-right of the sidebar. The available statuses—such as available, break, busy, etc.—inform the system to assign calls based on the agent’s state.
- To leave the queue, click the same button. It’s recommended to do this when the agent finishes their shift.
The queue login system in the agent console allows for efficient handling when dynamic agents are assigned to a queue.
If there is any incorrect or incomplete information, or additional information needs to be generated, please write to isscc@issabel.com